The USB flash drives, once ubiquitous, have lost some of their appeal with the rise of cloud-based services. But featuring a relatively linear pricing, physical portability, and ever-increasing transfer speed, USB flash drives are still relevant and used by most people to store data, backup, and transfer files from phone to PC/laptop and reversely. Yet one request that is often associated with the memory sticks is how to transfer files from USB to iPad, iPad Pro, or other mobile devices. In this post, we come forward with the top 3 solutions you could leverage to transfer files from USB to iPad/iPhone with or without a computer.
Transfer Files from USB to iPad via DearMob iPhone Manager
Designed as an all-in-one solution for iOS file management, DearMob iPhone Manager allows you to transfer everything stored in your USB to iPad/iPhone effortlessly, batch export 4K photos, GIFs, music, movies, podcasts, etc. from your external drives and remove DRM protection from purchased iTunes movies, Apple Music, and audiobooks for unrestricted access on your mobile devices. Included is also the ability to compress large videos on your flash drives to save up iOS space storage, and convert videos to Apple-supported format to easily place on your iPad devices. In addition, the GPU acceleration packed in brings to you the blazing-fast transferring speed, expediting large files transferring speed up to 60Mb/s.

DearMob iPhone Manager - The Easiest and Safest to Transfer Files from USB to iPad
- Transfer large videos, movies, audio, and files from USB to iPad, iPad Pro/Air/Mini, or iPhone.
- Optional compression feature to save up iOS space storage.
- Convert videos to Apple-support format for easier access on your iPad/iPhone.
- A Cloud-Based USB to back up and store every data and file on your iOS devices.
Step 1. Free download the iOS transferring tool on your PC or Mac, and run it.

Step 2. Plug in your USB to the computer, and connect your iPad with the DearMob iPhone Manager mounted computer.
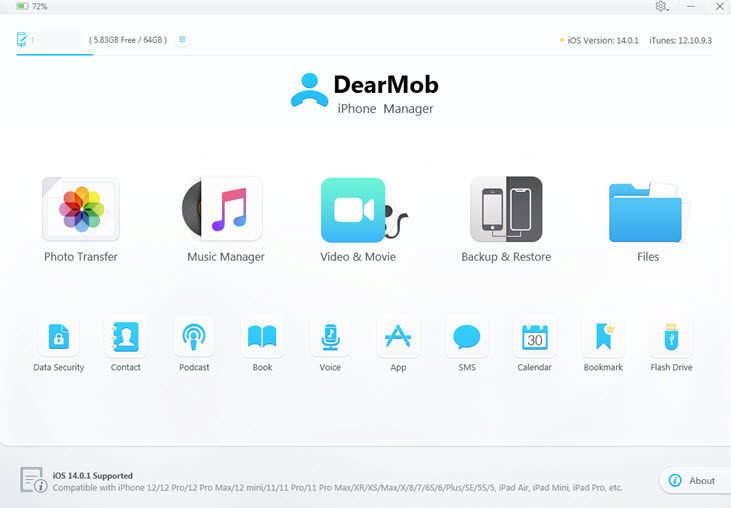
Make sure you unlock the iPad screen and tap to trust the computer for a successful connection. Both the USB cable and Wi-Fi connections are supported.
Step 3. On the home page, go to the sections that you wish to work with based on the type of files to be transferred (and here we will take the videos as an example).
Tap on the Video&Movie panel > Add Video, and in the window that pops up, select the video files from the USB drive to add to your iPad.
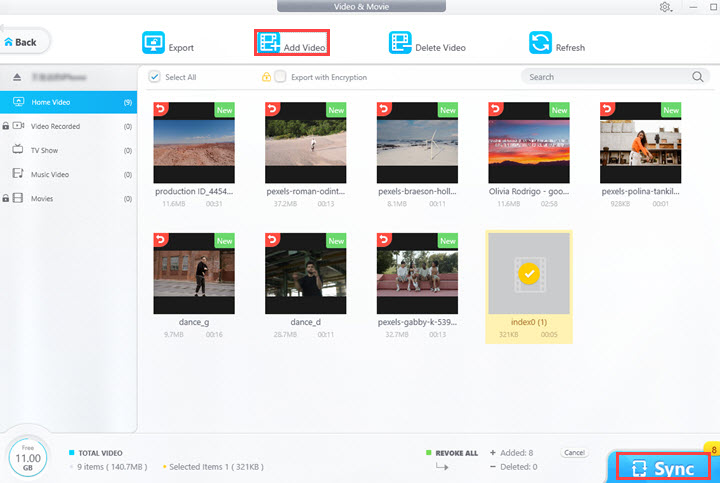
Step 4. Tap on the Sync button to transfer files from USB to iPad. Note that if it is the video that you transfer from the USB, then check the transferred file in the Apple TV app on your iPad.
Transfer Files from USB to iPad via the Default File Manager
For those who are reluctant to resort to a third-party service to transfer files from USB to iPad, you can check with the default file manager (File Explorer for Windows; Finder for Mac) to perform the work. See how to transfer files from USB to iPad using the default file manager. But note for Windows users, this solution is available only for transferring videos, photos, and audio from USB to iPad.
Step 1. Connect your USB drive and iPad to the computer via the USB port. Make sure you unlock your iPad and trust the computer.
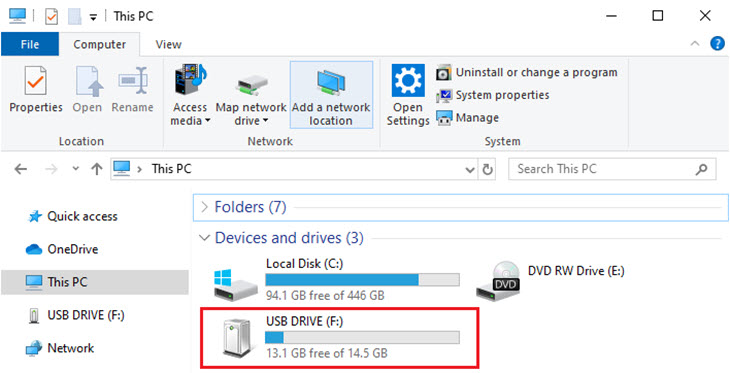
Step 2. For Windows users, go to 'This PC' > your USB, select and copy the files you wish to transfer.
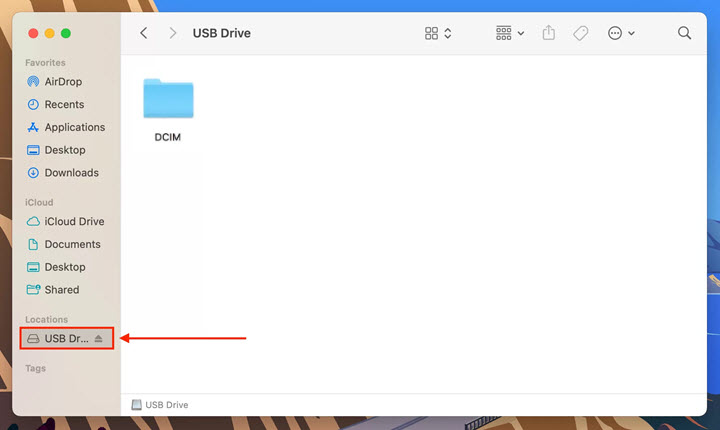
For Mac users, click the Finder icon in the Dock, and in the sidebar, click on your USB drive, and select the items you want to transfer.
Step 3. For Windows users, go to 'This PC' > your iPad > Internal Storage > DCIM > Apple and paste the files you copied from your drive into the folder.
For Mac users, drag the files you selected from Finder to the app with which you wish to work on your iPad.
Transfer Files from USB to iPad without Computer
Winding up the computer-based tactics, let's see how to transfer files from USB to iPad without computer. Well, there is no such thing as a free lunch, and with that said, to transfer files from USB to iPad without computer, you are going to need such a compatible connector or adapter as the Lightning to USB Camera Adapter or Lightning to USB 3 Camera Adapter (all sold in the Apple store separately), depending on your iPad model and the external device. See how to connect the USB to the iPad and transfer the files:
Step 1. Connect your USB to the adapter, and plug the adapter into your iPad (Make sure your device run iOS 13 and later).
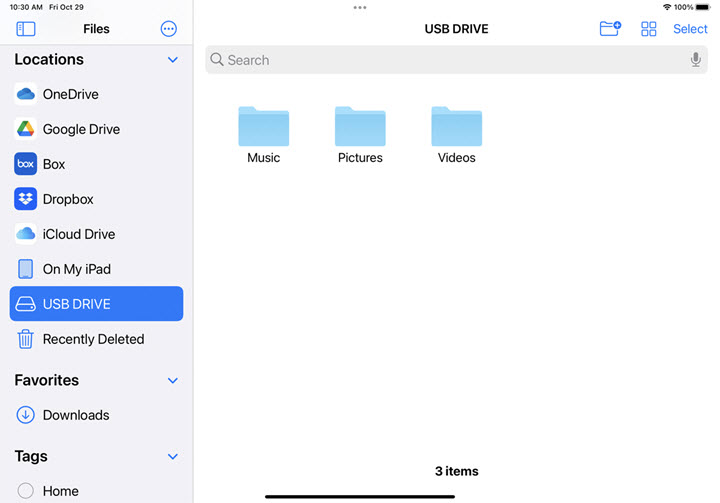
Step 2. Open the Files app on your iPad, tap Browse at the bottom of the screen, and tap the USB devices below locations.
Step 3. From the files and folders on your drive, select those that you wish to move to transfer to your iPad.
Bottom Line
Switch among the three solutions put above to transfer files from USB to iPad/iPhone based on your situation. But for those who wish for a thorough and limit-free transferring program to move whatever data and files placed in the external drive to their iOS device, check out DearMob iPhone Manager – the must-have transferring and backup iOS service app.