Move to iOS App is not the RIGHT way for a Used iPhone
Move to iOS App is designed in the spirit of all-or-nothing transfer. It works only if you want to move Android content to a new iPhone, as opposed to an iPhone that you used for some time, with content on it, and you have no intention to erase the content.
Why?
To initiate Move to iOS, you have to reach the App & Data screen on iPhone, and to reach the App & Data screen, you have to erase iPhone. It is designed in this way, so that even if you can select whether you want to keep contacts, or photos in Move to iOS, it is not the right way to ADD photos from Android to an iPhone with content that you don't want to erase.
If you have a brand new iPhone:
Step 1. Download Move to iOS on your Android.
Step 2. Power up your new iPhone, follow the instructions to set up iPhone until you see this App & Data screen. Choose Move data from Android.
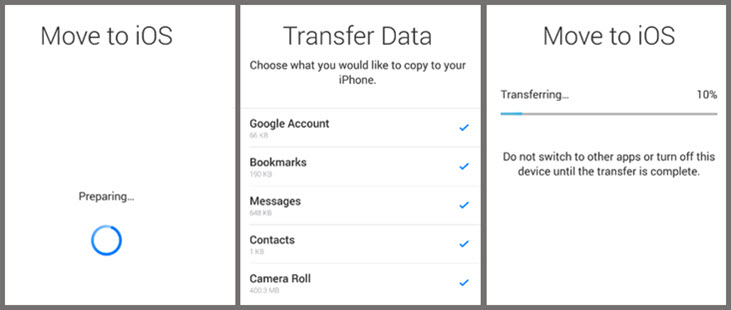
Step 3. Tap continues on both devices, and enter a 12 digit code when you are prompted.
If you have a used iPhone:
You cannot move Android photos to iPhone without erasing iPhone using Move to iOS.
If you want to keep all the data on iPhone, and at the same time import Android photos to iPhone, use one of the following methods instead.
Method 1. Transfer Photos from Android to iPhone with DearMob iPhone Manager
Transferring photos from Android to iPhone over the air could be broken sometime. Users constantly complain that Move to iOS app won't work, or not all photos get transferred. Against the momentum of wireless transfer, a computer is still the most stable and time-saving way to transfer large quantities of photos at full resolution.
Preparation: Download and install DearMob iPhone Manager for Windows or Mac.
Once you have moved photos from Android to a computer, DearMob iPhone Manager can help you to transfer these Android photos to iPhone easily and safely, without erasing existing data on iPhone.

DearMob iPhone Manager - Transfer Everything to iPhone
- 1-click feature to back up iPhone, clone iPhone, data migration
- Transfer photos, videos, contacts, digital books and more to iPhone
- Easily convert videos to iPhone-compatible formats on-the-fly
- Handy tools to set custom ringtones, merge duplicated contacts, etc.

Step 1. Connect Android phone.
Note:
For Mac users, install Android File Transfer and proceed to connect Android to Mac.
USB connect your Android phone to a Windows computer, choose the right mode depending on your specific situation:
- Picture Transfer Protocol (PTP): it allows you to view and copy photos on Android in the same way you connect a camera to the computer. There is no tons of folders showing up, and thus you won't mistakenly modify system files that were not intend for you to edit in the first place.
- Media Transfer Protocol (MTP): it allows you to view Android folders like you do with Windows explorer, so that you can copy and paste photos from camera roll, pictures folder, download folder, and any other folders that contain pictures, such as folder created by specific apps.
- USB Mass Storage (UMS): it allows you to preview all the folders on Android as you do with USB flash drives. Drawback is, if you have additional photos stored on SD card or USB storage (as oppose to your Android internal storage, you cannot access them from computer). Howtogeek's article on USB, MTP and PTP explained the reason behind.
Step 2. Copy photos from Android to a computer.
If you select PTP on your Android, you can simply import photos. If you prefer to view folders and manually copy or move photos, you can go to following folders depending on your photo type/source:
- Photos shot by your Android phone: DCIM folder.
- Screenshots: Pictures folder, or DCIM folder, depending on your phone model or brand.
- Downloaded photos: saved in your download folders in most cases.
Step 3. Transfer photos from computer to iPhone.
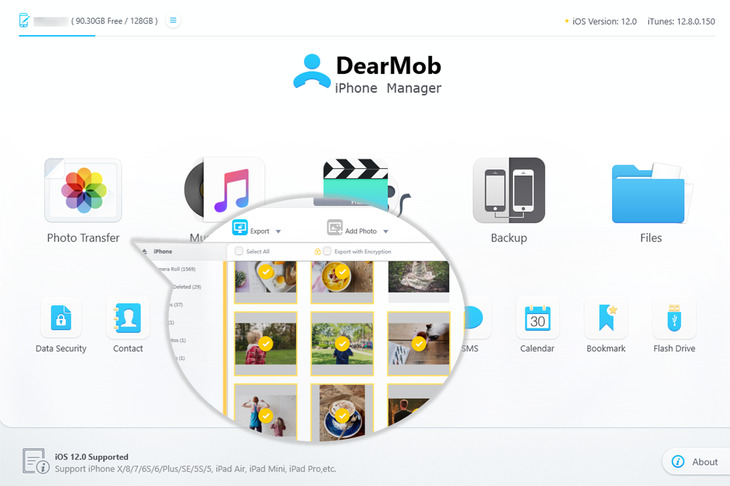
Now that you have everything prepared on a Windows PC or a Mac, you can use DearMob iPhone Manager to transfer photos to iPhone.
- Go to the Photos panel from the main interface.
- Select or create an album, and add photos that you just copied out of Android to the computer.
- Click Sync to confirm transferring photos to iPhone.
Extended reading: Transfer photos from Windows to iPhone with or without iTunes >>
For Mac users: Transfer photos from Mac to iPhone >>
Tips: Import Android Photo Albums on iPhone
If you have large quantities of photos, and prefer to better organize them into albums on iPhone, you can move Android photos albums to iPhone.
Step 1. Prepare all the albums you copied from Android to Computer with above steps.
Step 2. Use iPhone Photo Manager software to sync Albums to iPhone.
To better demonstrate the process, we use screenshot from DearMob iPhone Manager as an example. You can read reviews on iPhone photo manager and choose one that suits you.
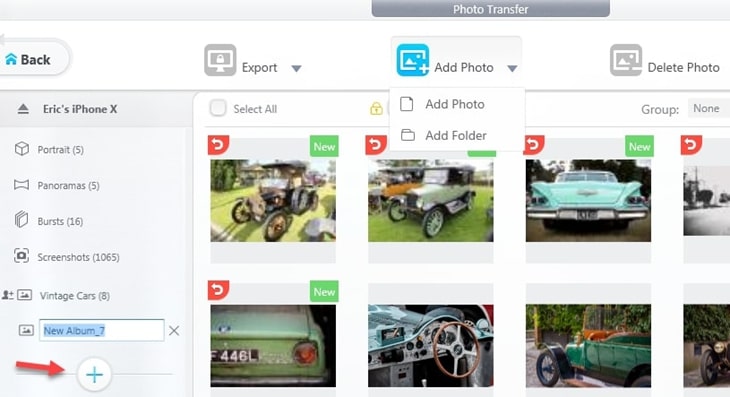
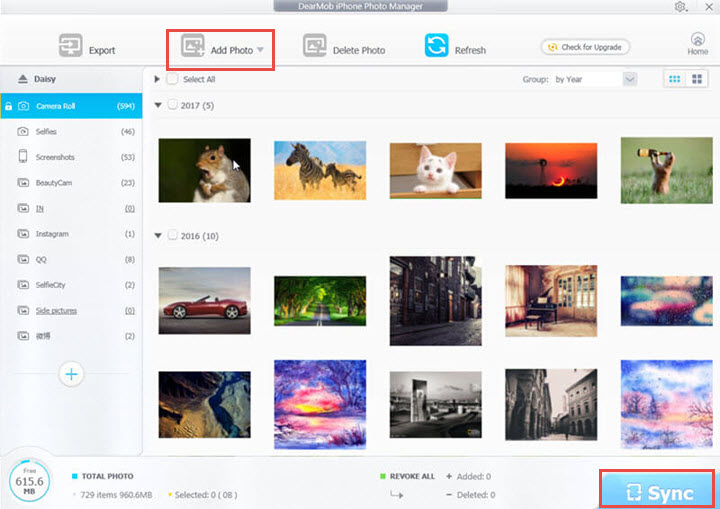
- Click + on sidebar to add an album or many albums.
- Drag and drop Android photos and hit sync. Photos will be transferred to iPhone camera roll.
Method 2. Transfer Photos from Android to iPhone with Google Photos
If you prefer a reliable wireless way to migrate pictures, Google Photos is the answer. As long as you have a good Wi-Fi network connection (or a 5G Android phone), and your photo doesn't exceed following limitations, you are good to go.
- Google Photos grants users unlimited storage for photos no larger than 16 megapixles.
- Photos larger than that will be compressed to the 16mp limitation — #108MP Samsung and Xiaomi users, attention!
Step 1. Install Google Photos on your Android phone, and allows it to backup your photos.
If the auto uploading process doesn't start, you can manually check photos to upload.
Step 2. On your iPhone, open up Google Photos and sign in with the same Google account you use on Android phone.
Step 3. Save photos to iPhone camera roll.
When Google photos finishes syncing, select all the photos, tap the share icon and select Save to Device.
Batch Download All photos from Google Photos
Syncing photos from Android to iPhone via Google Photos app could be extremely slow if you have tons of photos. You can visit Google photos online to batch download all the photos at once for good.
- Visit photos.google.com
- Press down shift to select photos from beginning to the end.
- Click three dots and hit Download.
Method 3. Transfer Photos from Android to iPhone with Drop Box
Depending on which service and platform you use to host your content, you can use Dropbox, OneDrive and the alike to transfer Android photos to iPhone. This methods works similarly with using Google photos, since the workflow are the same:
- Download the App on both devices.
- Set up the App and wait until the syncing finish.
- Save photos from the App to iPhone camera roll.
Same work flow, same flaws: you cannot maintain photo albums on iPhone camera roll in a structure that you carefully curated on Android. If you have tons of photos to organize, refer to Method 1 above.
FAQs:
Can I Use iCloud on Android to Move Photos?
No. There is yet a iCloud app on Android to sync photos, though you can use iCloud email account on Android to transfer your contacts and calendar content.
Can I use Samsung Smart Switch to transfer photos and content from Samsung to iPhone?
No. Samsung Smart Switch only supports the iOS to Android transfer, not the other way around.