Transfer Photo Albums from iPhone to Mac
By Joakim Kling - Last Updated:
| Contact Author
iPhone photos app groups photos under albums and categories, making it easy to manage and view photos. Transferring photo from iPhone to Mac by albums will retain those categories, so that you won't face thousands of photos all mixed together.
A telling example is screenshots and camera shots. Most of us certainly want to separate them. Screenshots can be a mess, with temporal screenshots we showed to a friend and forget to delete, or important screenshots of some documents, all mixed together.
If you are using Instagram, VSCO, snapchat and other photo sharing or edting apps, you will notice these apps create albums on iPhone in their own right. It would be nice to keep such album structure when importing photos to Mac.
Same goes to "favorites", where you keep all the best shots and pictures you like; and panoramas, animation/gifs, live photos, etc.
Method 1 Move Photo Albums from iPhone to Mac Folders
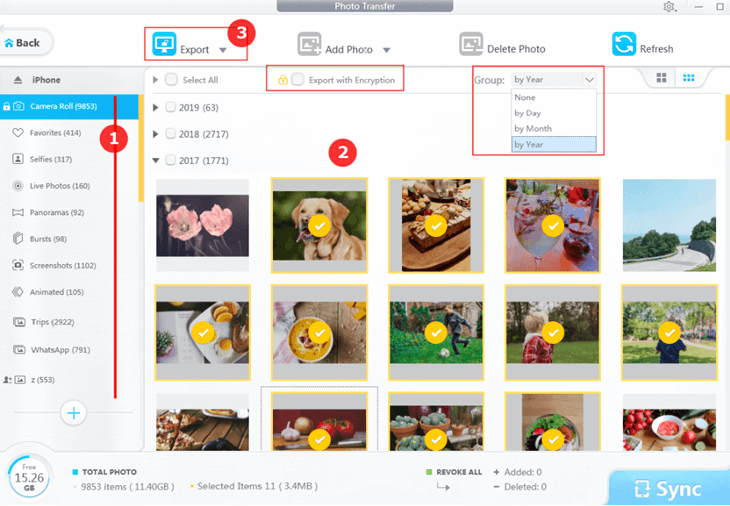
The app used in this tutorial is called DearMob iPhone Manager. You can take a look at its screenshot here.
It displays the photo albums the same as that on your iPhone 16/15/14/13/12/11/X, with cameral roll photos, favorites, bursts, live photos, long exposure, and user-created albums all showed up. You can select which to transfer, or transfer everything without losing quality, which is esp. good for large 48MP photos, HDR photos, and Apple ProRAW photos from iPhone.
To get started, install DearMob iPhone Manager, and follow 3 steps:
Step 1: Launch DearMob iPhone Manager for Mac, and connect your iPhone to Mac with USB cable.
Step 2: Go to Photos from DearMob home screen. Click on an album, select all the photos inside and click Export.
• When it's done, your photos within that album are copied on Mac, and you can see them in folders via Finder.
• You can create new folder in Finder, and drag photos into the folder.
Note: For your convenience, photos stored in the Hidden album will not show up in Camera Roll. Therefore, you can export every photo in 1-click from the camera roll, without worrying about sensitive photos being exported, since the photos you choose to are stored in a separate album.
Step 3: Repeat Step 2 to move other albums from iPhone to your computer.
By transferring photo albums to Mac, you can back up iPhone photos flexibly and stay assured that there's always a copy on your computer.
FAQ:
1. Will the photos be compressed upon transferring?
No, your photos will be copied to Mac at original resolution; there is no quality loss at all.
2. Can I transfer photos at once (10,000 pieces for instance)?
Yes. If you prefer to transfer all photos from camera roll, you can select all for batch transferring. DearMob is stable and efficient to transfer large quantities of photos.
3. After I transferred photo albums from iPhone to Mac, will photos on iPhone get deleted?
No, unless you choose to delete photos. In this way, the App guarantees no photo will be accidentally erased, and you can rest assured.
Method 2 Import Photos Albums from iPhone to Mac with Photos App
Make sure your iPhone is turned on, unlocked, and won't auto lock for some time: some users might set an Auto-Lock for 30 seconds, which may interrupt data transferring.
Prevent short time auto-lock:
Go to Settings > Display & Brightness > Auto-Lock. Set a longer time or tap Never.
Step 1: Launch Photos app on Mac, and USB-connect your iPhone.
Step 2: Click your device name, select photos and do one of the following.
- • Import to Library: your photos will be transferred to Imports folder on the sidebar.
- • Import to Album or New Album: iPhone photos will be imported into an album you designate.
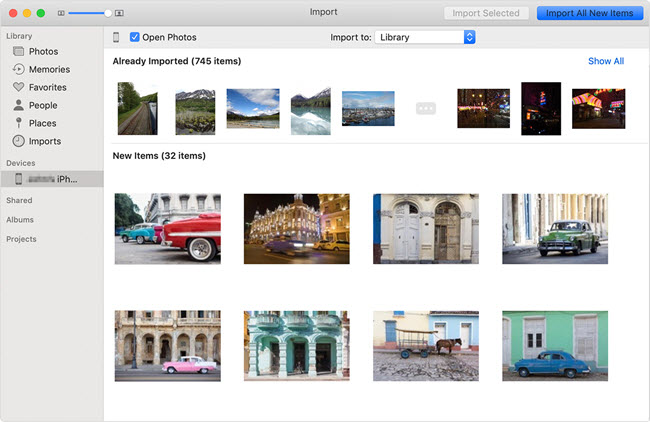
Step 3: Use smart album to manage imports.
Method 3 Download Photo Albums from iCloud
What is the different of "downloading photo albums from iCloud" vs "enabling icloud photo syncing in Mac Photos App"?
By downloading photo albums from iCloud, your photos will be stored in folders, just as any other files or videos you download from online. You can easily manage the folder via Finder.
By enabling iCloud photo library, you don't need to manually manage photo albums, which will keep synchronizing with all your other devices that have iCloud enabled. But all your photos will be stored on:
iCloud server: optimized way, and you are viewing a reduced quality of pictures via Mac Photos App);
Photo library on Mac: a database, analogical to iTunes music library. You can find it in ~/Pictures/ with the name Photos.photoslibrary and right click show Package content to access folders that stores photos in the database.
To transfer photo albums from iPhone to Mac via iCloud, follow these steps:
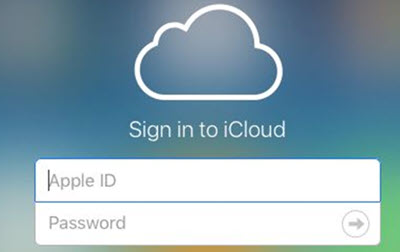
Step 1: Visit iCloud.com on your Mac, and log in with your Apple ID.
Step 2: Click Photos icon, and go to a specific photo album.

Step 3: Select photos from an album. You can either:
• Hold down Shift key and click to select multiple photos.
• Press Shift + Command + Alt Keys to select all the photos.
Step 4: Click the download button at top right – it is a cloud icon with down arrow.
You can repeat step 2 - step 4 to download photo albums from your iPhone to Mac via iCloud. By default, Safari stores downloaded items in Downloads folder, which you can access via Finder.
Note: You might see following warning when photos exceed 1000 limits in iCloud.
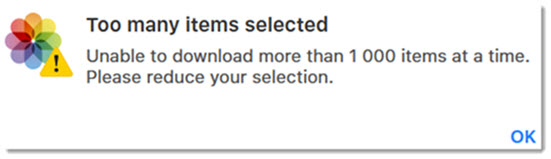
Therefore, if you have 999 photos with an album, you can download it at once, otherwise, you won't be able to transfer photos to Mac at one time via iCloud downloading.
Method 4 Use Shared Album to Move iPhone Photos to Mac
Instead of logging into iCloud.com to download photos albums, you can also enable iCloud photo library in Mac photos App, and set up shared album on iPhone too. By doing so, your shared albums will keep synchronizing from iPhone to Mac.
Step 1: On iPhone, enable shared album, and add photos in it.
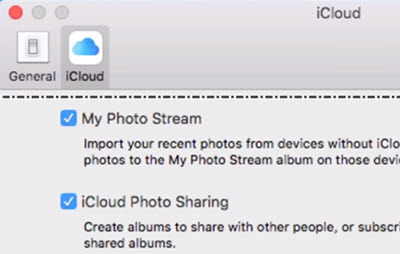
Step 2: On Mac, Go to Settings > iCloud > iCloud Photo Sharing, toggle it on.
Step 3: Click share album at sidebar from Mac photos App, and wait till the syncing is completed.
FAQ:
1. Is there any limitation of photo numbers in shared album?
• According to Apple Support, the numbers of photos you can upload are: 1,000 per hour and 10,000 per day.
• However, a Shared Album can hold up to 5000 photos, so that you need to create multiple shared albums if your pictures exceed 5000 pieces.
2. Do Photos in shared album take up storage space?
Apple Support claims that Photos in your Shared Albums are stored in iCloud, but they don't count against your iCloud storage limit.
Download Free Trial with full features of DearMob iPhone Manager for Windows and Mac: