Speaking of moving photos from iPhone to iPhone, it seems that no one can escape the major two scenarios - to transfer photos from your iPhone to your friends' iPhone, or from your old iPhone to a new one. But the demand varies from person to person:
Demand 1: transfer a huge amount of iPhone photos from old phone to new or from you to your friend's phone
"2000+ photos on her old phone to be transferred to new iPhone"
Demand 2: merge photos from old to new
"have photos on both old and new iPhone devices like 100+ on new phone and do not want to miss any."
Demand 3: get your new phone to be identical to the old one
Demand 4: Transfer photos in original resolution with EXIF data from one iPhone to another
Demand 5: Transfer photos with Caption/text from iPhone to the new iphone 16/15
Thus here, we gather as many iPhone to iPhone photo transfer methods as possible to cater for your special needs.
How to Transfer Photos from iPhone to iPhone Using DearMob iPhone Manager?
Best for Viewing Photo Captions Before Export from iOS 18 or earlier OS
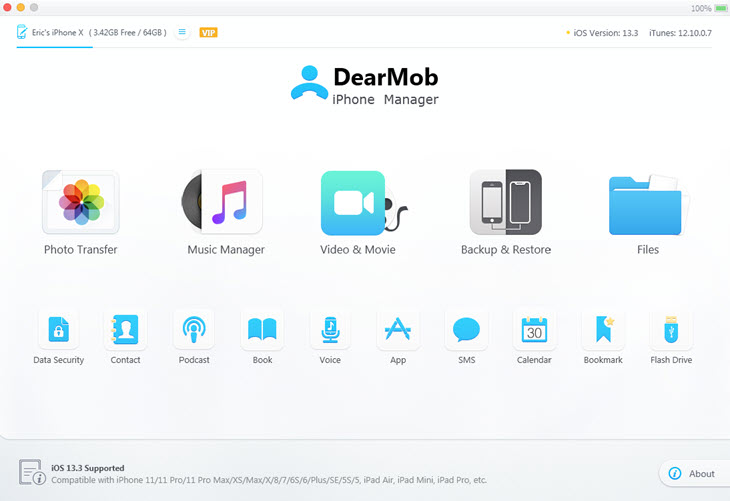
DearMob iPhone Manager is a desktop iPhone data management application that can safely transfer zillons photos, videos, songs, contacts, and other data from iPhone to PC and reversely. It keeps all the captions/text on a photo viewable on your PC end before transfer and move photos around with EXIF data preserved, no quality loss concerns (esp. good for 48MP photos from iPhone 16/15/Pro/Pro Max).
Step 1: Download the software and launch it. Cable connect your iPhone to the same computer.
Step 2: Click Photos icon on the main UI to arrive at the Album panel
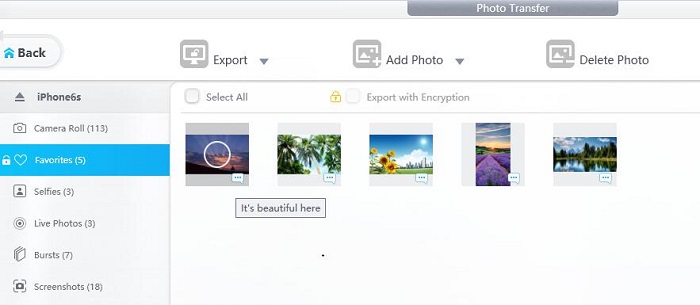
Step 3: Select photos you want to transfer by year, month, and date and click Export
Step 4: Connect to another iPhone and click Add Photos to import previously exported photos
The best part I love about this iPhone photo manager is its quick update rate to become compatible with the latest iOS 18 and Beta versions. It goes very nitty-gritty to take care of your iPhone photos and other data along.
How to Transfer Photos from iPhone to iPhone Using AirDrop?
Airdrop - best for transferring no more than 50 photos
I opt for AirDrop mainly for its conveniences. The innate wireless photo transfer feature between iOS devices - AirdDrop offers the most straightforward and fast experience when several friends are waiting for me to share pictures for posting on Facebook or Instagram. Those photos and videos will be directly saved in Photos Camera Roll.
Cons:
1. To transfer over 50 photos, AirDrop will keep you waiting
2. Wireless transfer is unstable as known to all. Sometimes, you will get stuck at the preparing stage or end up in matching failure
3. AirDrop requires most recent device models: older models of iPhone like iPhone 4s and iPad 2/3/mini do not have Airdrop utility.
4. If you guys are on different iOS systems, you will encounter higher chances of connection failure. And if you AirDrop to multiple iPhone at the same time, you can also run into connection issues every easily.
5. Multitasking issue: during AirDroping, you cannot do other things - like posting, watching videos etc on your iPhone and an incoming call may stop your transfer process.
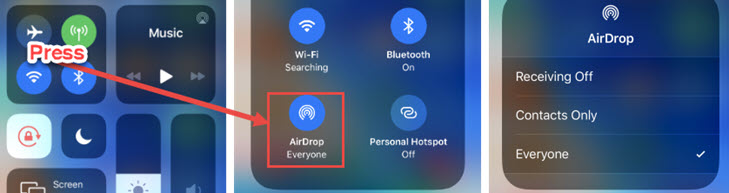
Step 1. Swipe up/down to call out the control center
This operation may differ from iPhone models to models. On iPhone X, you swipe down from the right upper corner.
Step 2. Force touch the connection square panel
Call out the AirDrop connection button.
Step 3. Hit it and select everyone in case you don't have each other's contacts
Step 4. Go to Photos app and select photos you want to transfer
Step 5. Tap the share icon ![]() and go on tapping AirDrop
and go on tapping AirDrop  and all your contacts will be showing up. Simply select them one by one.
 Tips and notes
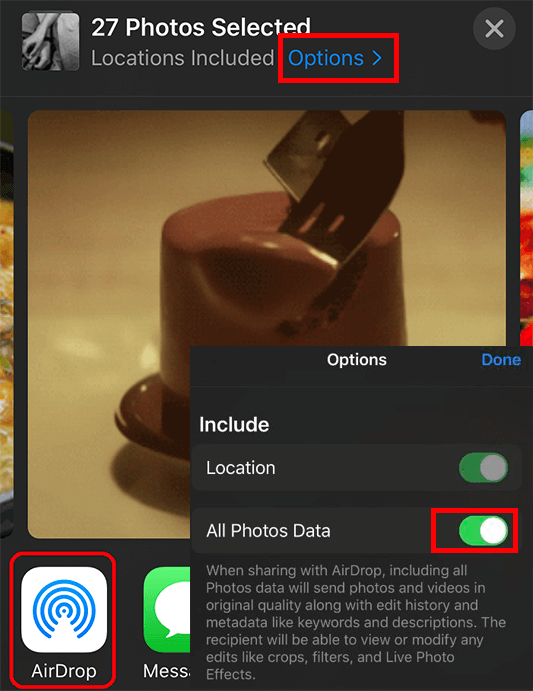
By tapping Options, you can choose whether to include location and EXIF data or not.
How to Transfer Photos from iPhone to iPhone via Messages?
Messages is another way to transfer photos wirelessly, but slower than AirDrop. Would not suggest using this approach to transfer too many individual photos - over 10. The only merit of this solution is to efficiently send a great number of photos as iCloud link. The recipient will be able to download and view photos and videos later on.
Step 1. Go to the Photos app and select photos you want to transfer
Step 2. Tap the share icon and select Messages app.
Step 3. Choose your friend from the Contacts.
Step 4. Tap the send arrow.
Your image will be sent as attachment in Messages.
Then, how to download the photo from Messages to photo albums/camera roll?
Step 1: simply tap the photo, and hit the share icon on the top right corner to call out more options
Step 2: Swipe up the panel and you will see "Save Image" option
Step 3: Tap it and you will find the picture in your Recents photo album.
Tips and notes
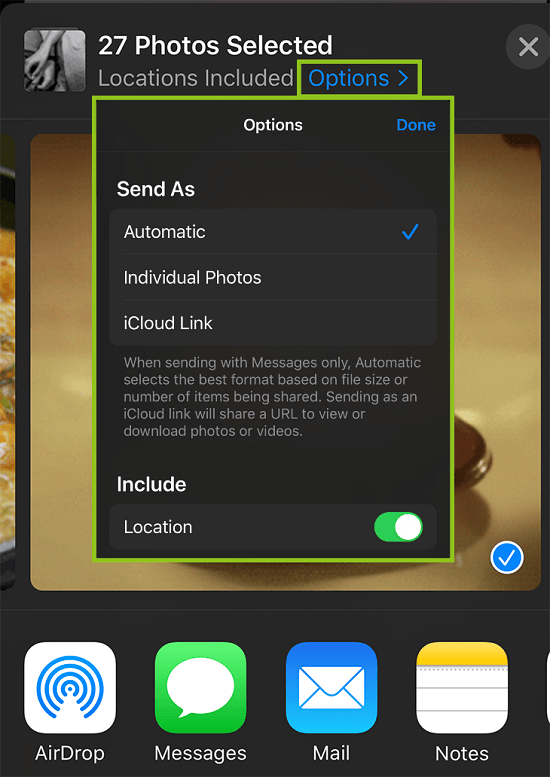
When sending photos with Messages only, you can choose to send as Automatic so that the device will decide whether you send as individual photos or as a iCloud link. But i would sugggest that you decide this on your own, which could avoid "unable to share photos" issue. Also, the iCloud link will only be valid for a month.
How to Transfer Photos from iPhone to iPhone Using Email?
Nowadays, we have email app installed on your iOS devices. Why not make full use of that service when the above two options lead you to a dead end? This option always goes third when i want to transfer photos in bulk wirelessly because it does not aquire the merit of speed nor efficiency.
Step 1: In your Photos app choosing the photos you want to transfer
Step 2: Click the share button and choose Mail app
or you can hit Gmail app/Outlook app to transfer iPhone photos to your friend
Note that when using third party email apps, you should open and log in the app first.
Step 3: Add the recipient and title
Step 4: Click the arrow pointing up right in Mail app to send
For outlook app users, wait for preparing and send the file when attachment is ready.
Some times you will be asked to resize the photo for transfer. And to retain original sizes, choose keep original.
How to Transfer Photos from iPhone to iPhone via Whatsapp
As for sending photos from iPhone to iPhone via third party apps, i would recommend Whatsapp and Google Photos. First of all update your WhatsApp to the latest version.
Step 1: Open the chat you want to send the picture and click on the attachment icon.
Step 2: Click on the Document
Step 3: Click on Browse other docs…
Step 4: Select your image file and send.
Your images will be sent as attachments without compression.
You can also send any other file using Whatsapp upto 100MB.
Click on the share button on and choose Whatsapp and then choose the person you want to send to.
How to Transfer Pics from iPhone to iPhone via Google Photos
Google photos can be both wired and wireless when you have installed Google photos app on your iPhone/iPad.
Simply drop photos to google photos and it will be saved in Google Cloud storage and can be synced to other places you want. The best part of this third party application is that you can view HEIC photos without conversion.
Step 1: Sign in to your Google photos account
Step 2: On your iPhone, your Apple photo library will be auto backed up in Google photos.
Note that those photos saved in iCloud but visible to you are not stored locally, and Google photos won't be able to fetch those. So you will need to make sure all those photos saved are on your device.
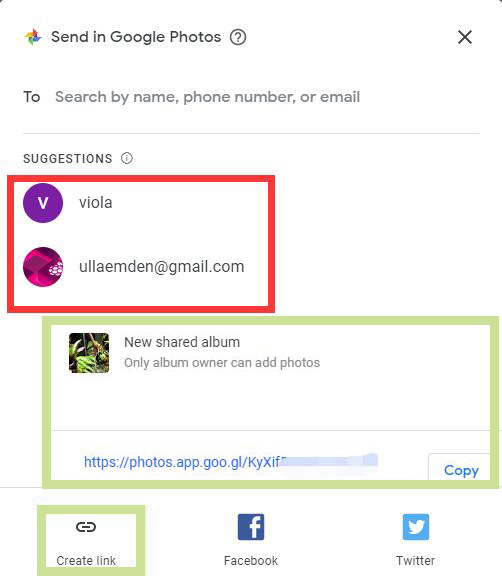
Step 3: Choose photos to share
Now you can choose multiple photos to share via gmail or as a link.
How to Transfer Photos from iPhone to iPhone via Computer
When you take computer into consideration, I bet that you must have tens and thousands of iPhone photos to migrate. If it's not several GBs of photos, I would recommend that you choose the wireless options above.
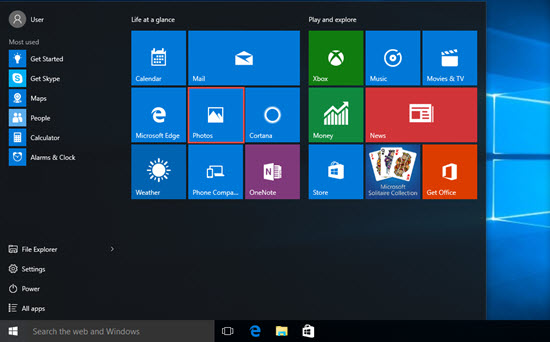
For Windows 8/10:
For Windows 8 or 10 users, you can use Photos app for Windows to transfer photos from iPhone to PC and then back to iPhone.
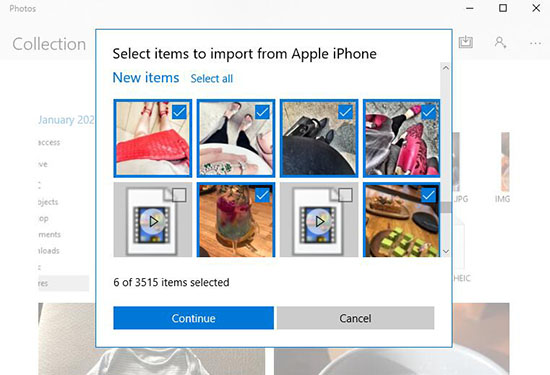
Step 1. Connect your iPhone to Windows 8/10 PC -> Open Photos app -> Click Import.
Step 2. Choose the iPhone you want to import your photos from.
Notice: Photos app will automatically detect all photos on your iPhone, and you can click Select all or select multiple photos to transfer from iPhone to Windows 8/10 PC.