Apple's ecosystem stands among the brand's most competitive edge over its rival. This is particularly true when it comes to content sharing and file transfers. With all its products functioning seamlessly together, users can easily distribute digital materials and files among multiple devices. Despite this, some users may still find it challenging to transfer file between iPhone and Mac, which is why we've put together a complete tutorial outlining the top 6 ways to transfer file between iPhone and Mac.
Best Ways to Transfer File between iPhone and Mac:
- 👍 DearMob iPhone Manager: The overall best way to transfer file between iPhone and Mac. Effortlessly transfer files between iPhone and Mac of any sort.
- AirDrop: Share photos, videos, locations and other files between Mac and iPhone.
- iCloud Drive: Transfer documents and files between Mac and iPhone.
- iTunes: Share only certain files between iPhone and Mac.
- Email: Store and share small files between devices.
- Sync: Directly transfer files between iPhone and Mac running Catalina or later.
Transfer File between iPhone and Mac via DearMob iPhone Manager
Designed as an all-in-one solution for iOS files management, DearMob iPhone Manager allows for the effortless transfer of files between iPhone and Mac, enabling users to easily backup, restore, and transfer a vast collection of data, 4K photos, GIFs, videos, movies, and other multimedia content. The versatile iPhone transfer software supports both full and selective transfers/backups of users' data, ensuring that all important files are preserved and easily accessed. Additionally, the program can convert incompatible photos, media files, and books to Apple-friendly format before transfer so users can open and play media files on their iDevices seamlessly.

DearMob iPhone Manager - Effortlessly Transfer File between iPhone and Mac of Any Sort
- Transfer files from iPhone to Mac or reversely: videos, images, files, audio, contacts, etc.
- Transfer data from iPhone to iPhone with ultra-flexibility; Lightning-fast and stable file transfer without freezing.
- Organize, edit, and view every bit of data saved on your iPhone and Mac for easy transfer.
- Create custom ringtones, convert to Apple-supported format, encrypt files, unlock DRM, and more...
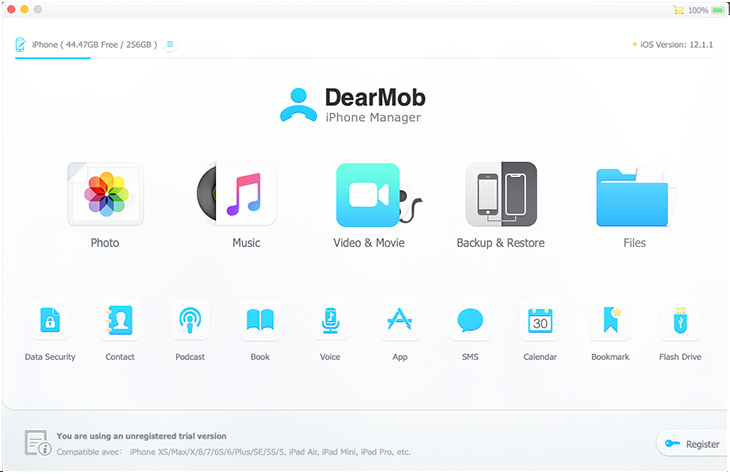
Step 1. Free download DearMob iPhone Manager on your Mac, and connect your iPhone to the Mac computer (both cable and Wi-Fi connections are supported), and make sure to unlock the iPhone screen and tap Trust this computer when you are prompted on your iPhone for a successful connection.

Step 2. On the home page, select the tab to transfer iPhone videos, contacts, podcasts, books, voice memos, custom ringtones, calendar events, safari bookmarks, and FLAC music to iPhone. You can also use the Backup feature to transfer all your files between iPhone and Mac. And we take Photo Transfer as an example here.
Step 3. Transfer files between iPhone and Mac.
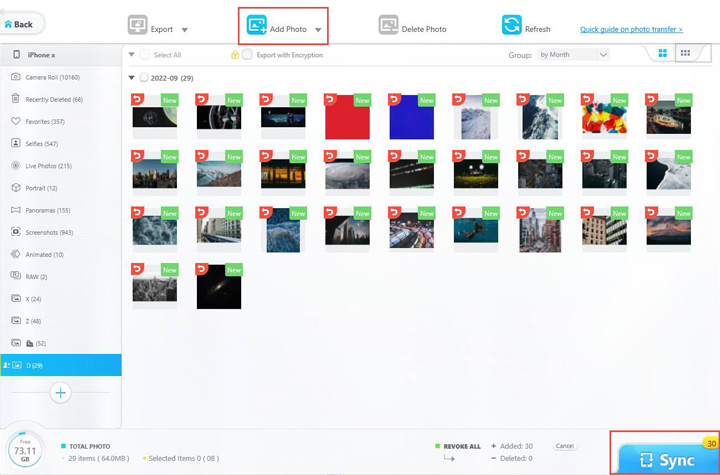
In the Photo Transfer panel:
- To transfer files from iPhone to Mac: Select all or some of the photos you wish to transfer from iPhone to Mac, click on Export, and in the drop-down menu, choose Export to transfer the photos from iPhone to Mac.
- To transfer files from Mac to iPhone: Scroll down on the album list at the left side, find the + icon, and click it to create a new album. Select the photos or photo folders that you want to import from Mac to iPhone (drag and drop is allowed), and click on Sync to apply the transfer.

Transfer File between iPhone and Mac via AirDrop
AirDrop utilizes close-range wireless communication to facilitate the seamless transfer of diverse files to adjacent iOS devices or Mac computers. And this feature comes with the added advantage of not imposing any limitations on the file size, rendering it an exemplary solution to transfer file between iPhone and Mac.
Step 1. Ensure that Wi-Fi and Bluetooth are enabled on both your Mac and iPhone. And also turn on AirDrop on both devices.
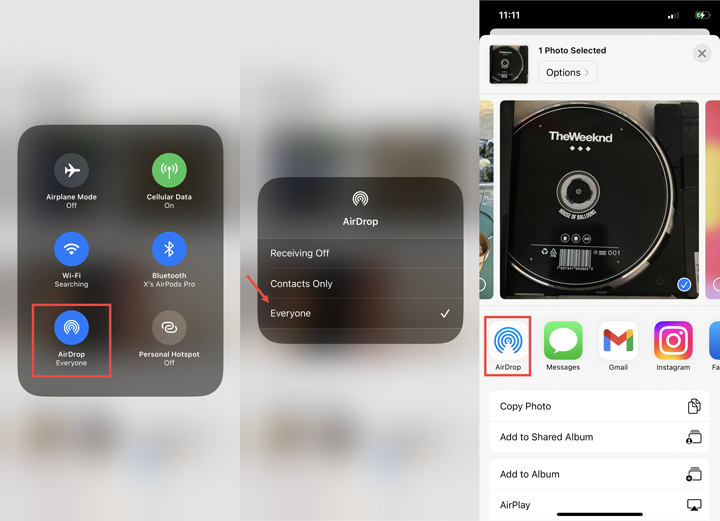
- For iPhone: Swipe down from the top right-hand corner of the screen to open the Control Center, find and select the AirDrop button, and set your iPhone to be discovered by 'Contacts Only' or 'Everyone'.
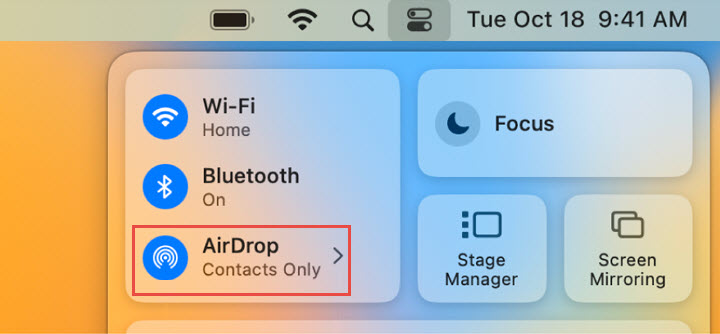
- For Mac: Click Control Center in the menu bar to quickly turn on your AirDrop, click on the arrow next to AirDrop, and select either Contacts Only or Everyone.
Step 2. Transfer files from Mac to iPhone or reversely.
- To transfer files from iPhone to Mac: locate the file you wish to transfer, click on Share or the Share button, tap the AirDrop button, and press the Mac device from the options given to transfer your files to Mac.
- To transfer files from Mac to iPhone: Control-click the item you want to send, choose Share from the shortcut menu, choose AirDrop, then select the iPhone device you want to send the item to. Or you can go to the Finder sidebar, click AirDrop and drag the item to the iPhone device you want to send it to.

Transfer File between iPhone and Mac via iCloud Drive
As a part of the iCloud ecosystem, iCloud Drive is built into Apple's Files app, thereby offering the capacity to securely archive and retrieve files and folders within the Files app, and enabling seamless access across all of your devices that share the same Apple ID. And any edits made to your documents or files are instantaneously synchronized across all connected devices that are iCloud Drive enabled. This is especially useful for transferring Word, Excel, PPT, PDF files, etc. between iPhone and Mac.
Note:
Each account is endowed with a mere 5GB of free iCloud storage, and additional storage is available for a monthly fee, with options for 50GB, 200GB, or 2TB of total storage.
Step 1. Turn on your iCloud Drive on your iPhone and Mac.
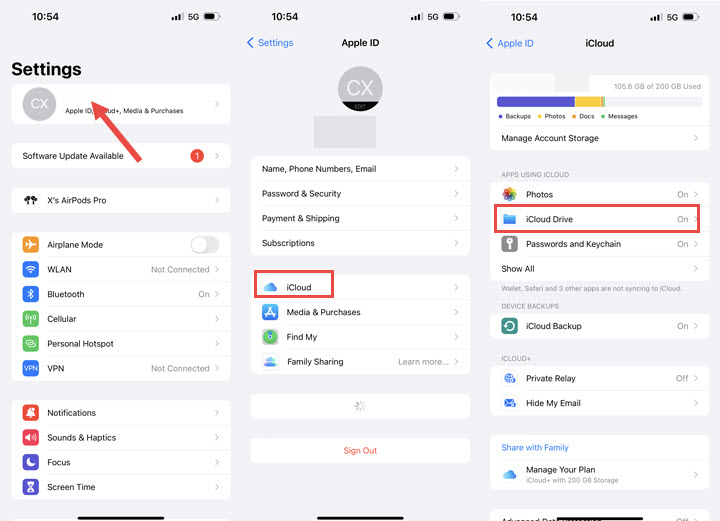
- For iPhone: head to Settings > [Your Name] > iCloud > iCloud Drive to turn the service on.
- For Mac: go to the Apple menu > System Settings > System Preferences > [Your Name] > Select iCloud > Turn on iCloud Drive.
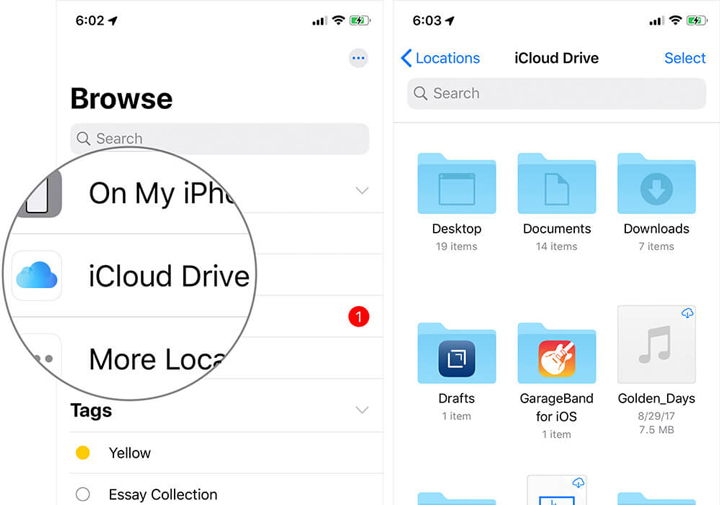
Once enabled, you can access iCloud Drive inside the Files app on your iPhone/iPad or from the Finder sidebar on a Mac.
Step 2. Upload the files you want to transfer to iCloud Drive from your iPhone or Mac computer.
Step 3. You'll be able to access the same files from both your phone and Mac using iCloud Drive on your Mac and the Files app on your iPhone. And if you want to download the file for offline use, simply press the Download Now option on the file.
Transfer File between iPhone and Mac with iTunes
Apple introduced the iTunes File Sharing feature in the iTunes 9.1 update. With this feature, you can effortlessly transfer various types of files such as photos, videos, documents, and books across your Apple devices, Mac computers, and Windows devices.
And to enable iTunes File Sharing, you need to:
- Install the latest version of iTunes.
- The latest version of macOS, iOS, or iPadOS.
Step 1. Open iTunes on your Mac. Connect your iPhone/iPad to your Mac computer using a USB cable.
Step 2. Click your device in iTunes, and in the left sidebar, click File Sharing.
Step 3. Select the app that you want to transfer a file to or from, and then transfer the file between iPhone and Mac.
- To transfer files from MacOS to iOS/iPadOS: Click "Add", select the file you want to transfer, and then click "Add". You can also drag and drop the files from your Mac computer onto the Document list to transfer them to your device.
- To transfer files from MacOS to iOS/iPadOS: Click "Add", select the file you want to transfer, and then click "Add". You can also drag and drop the files from your Mac computer onto the Document list to transfer them to your device.

Transfer File between iPhone and Mac via Email
With the capability to transport multimedia, Email could also help to transfer files between iPhone and Mac. But it is important to note that certain Email providers may impose size limitations on the files you transfer.
Step 1. Locate the file you wish to send on your iPhone or Mac, and tap on the Share button. Choose either the default Mail service or the preferred Email app. Fill out the details of the addressee and the addresser, and click on Send to transfer the file (make sure the email is set up on another device).
Step 2. Go to another device, open the Email app, and find the message you just sent. Download and save the attachment.
Transfer File between iPhone and Mac via Sync
The Sync feature in Finder could ensure that any supported content (music, movies, TV shows, podcasts, photos, contacts, calendars, etc.) stays updated between your iPhone and Mac computer. And the first time you set up syncing, you must connect your device to your Mac using a USB or USB-C cable, and then you can set them up to sync wirelessly and automatically whenever they are connected to the same Wi-Fi network.
1. Using a USB cable
Step 1. Connect your iPhone and Mac with a USB or USB-C cable.
Step 2. Go to the Finder on your Mac, and select your device.
Step 3. Select the content to transfer between iPhone and Mac.
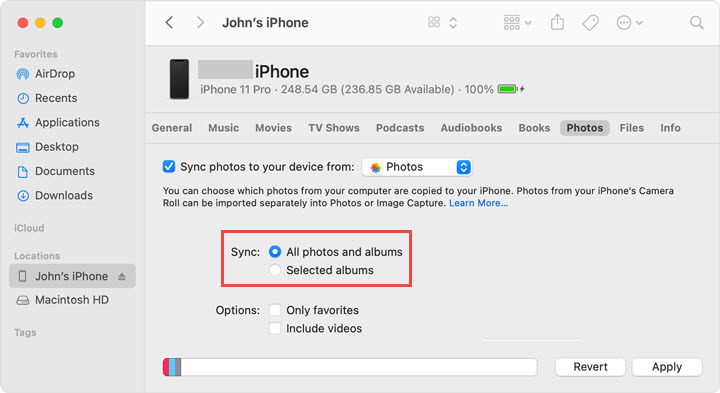
- To sync files from Mac to iPhone: Click the type of content you want to sync in the button bar. Select the "Sync [content type] onto [device name]" checkbox to turn on syncing for that type of item. With the checkbox selected, syncing is set to transfer all items of that type to your iPhone.
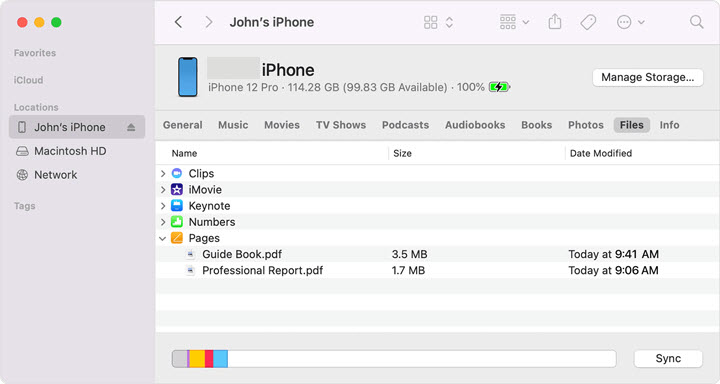
- To sync files from iPhone to Mac: In the Files tab, click on the triangle next to an app to see the files that you can share and transfer. Now select and drag the files from your iOS device onto your Mac to transfer files from iPhone to Mac.
Alternatively, you can also click on the Files tab, and open another Finder window by pressing Command + N. Select the files that work with an app on your iOS device, and drag them onto the app to transfer files from Mac to iPhone.
2. Using Wi-Fi
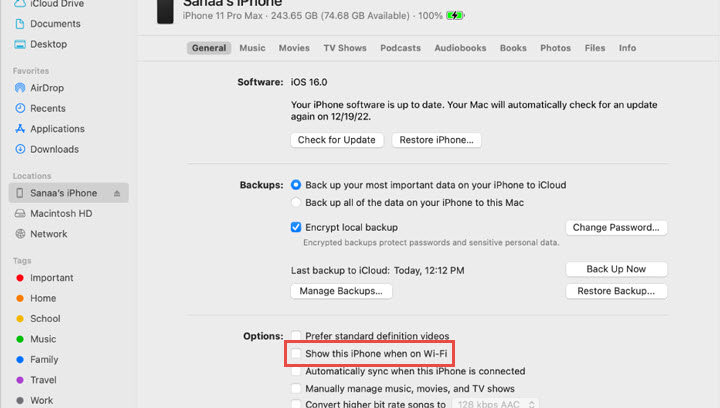
After connecting your iPhone and Mac computer with a USB or USB-C cable, you can set up the Wi-Fi syncing: Click on your iDevice in the sidebar, go to the General tab, and check the option 'show the [device] when on Wi-Fi'. Use the button bar to adjust the syncing setting based on your needs and click Apply. Now when your iPhone and Mac are connected via Wi-Fi, you can select your device in the sidebar and sync files.
FAQs
1. How to transfer files from mac to iPhone without iTunes
iTunes was discontinued by Apple after receiving increasing criticism for a bloated user experience. And for those who are reluctant to transfer files between iPhone and Mac using iTunes, you can check the other 5 transfer tools suggested above to send your files.
2. How to transfer files from PC to iPhone or reversely
If you are struggling to transfer files between a non-Apple computer and your iDevice, try using DearMob iPhone Manager, a must-have iOS transfer and backup app for every iPhone/iPad owner to easily move data and files between your PC and iPhone/iPad.